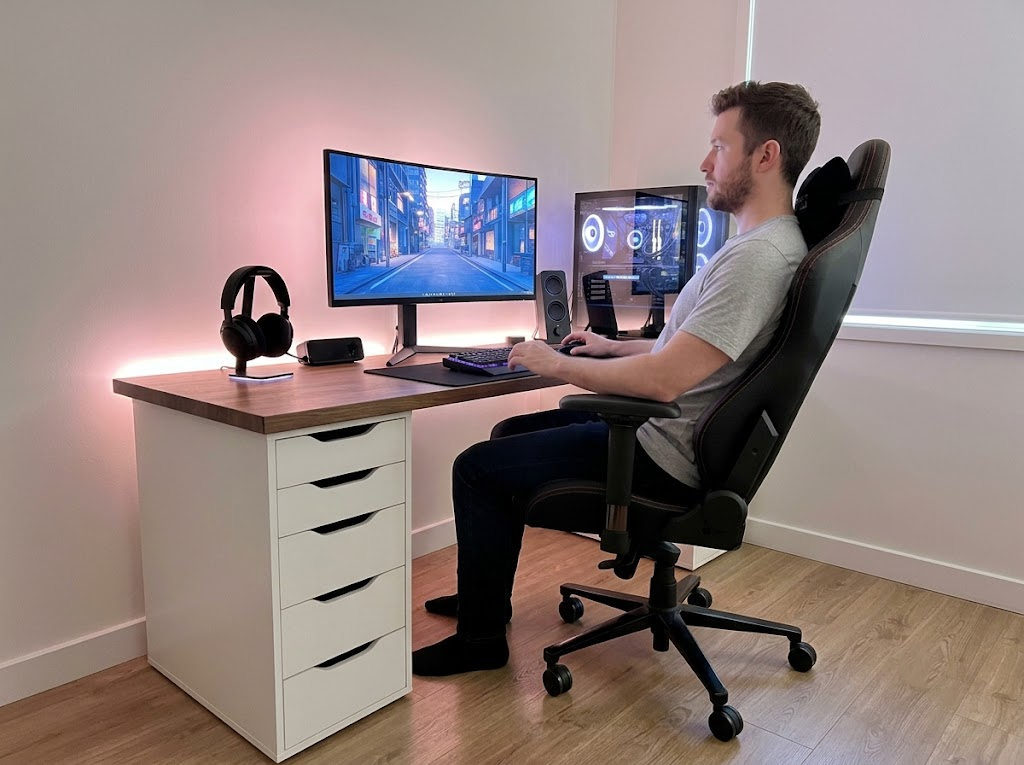


Most ergonomic chairs ship with a dozen or so adjustment points, and most people only ever touch two or three of them. The backrest sits wherever it shipped from the factory. The lumbar pad rests three inches too high. Six months later, the same lower back ache the chair was supposed to solve has come right back.
This happens more often than most people realize. An ergonomic chair only works as intended once someone actually sets it up for their own body. Owning one is only the first step. Knowing how to adjust an ergonomic chair is what actually separates a chair that fixes posture from a chair that quietly makes it worse.
Why Adjustment Matters More Than the Chair Itself
A $1,200 chair set up incorrectly can leave you sorer than a $150 chair set up well. OSHA’s guidance on computer workstation components centers on what’s called a neutral posture, where your joints stay aligned, and your muscles aren’t working overtime just to hold you upright.
A chair earns its keep by supporting your feet and back well enough to maintain that posture. When one setting is off, your body finds a workaround elsewhere, and that workaround rarely shows up as pain on day one. It builds slowly over weeks, which is why most people blame the chair long before they check the settings that have been sitting untouched underneath it.
>>> Read more: Ergonomic Workstation Setup Checklist
The 8 Settings Most People Get Wrong
Each setting below covers the most common mistake people make, the target to aim for, and a way to check it without any tools.
None of these takes more than a minute once you know where to look, and small corrections here tend to add up fast.
Also check out our video guide on 8 correct ways to setting up your ergonomic chair
1. Seat height
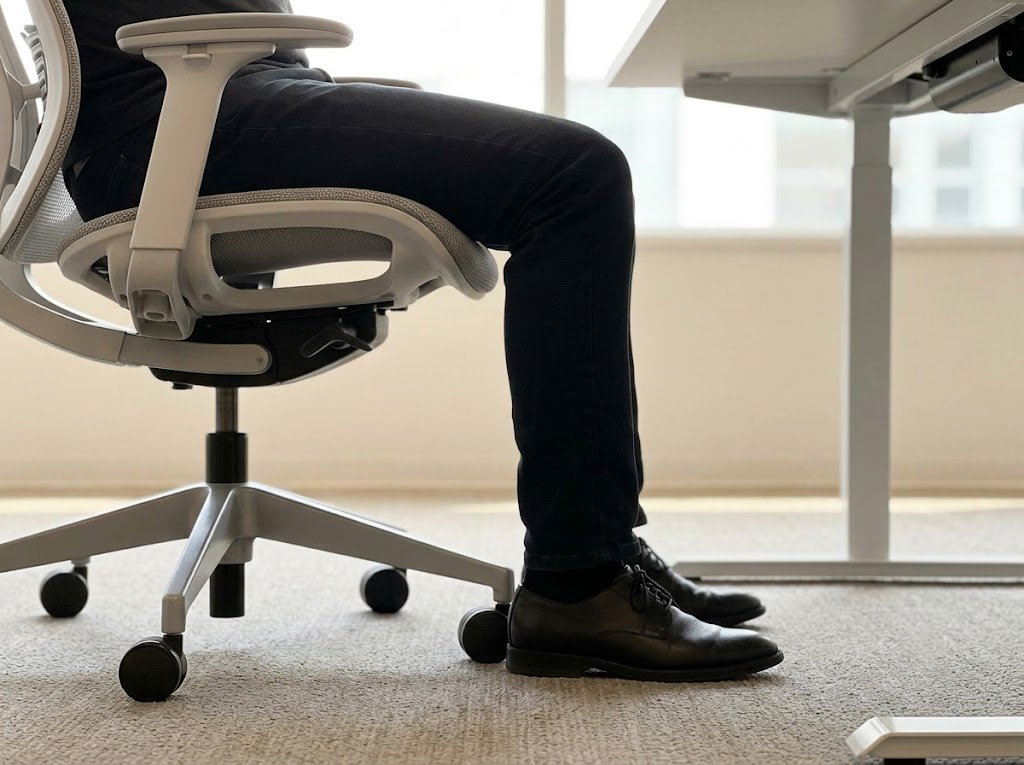
Seat height sets the foundation for the rest of the chair, since it decides how your legs meet the floor and how your torso lines up with the desk.
The goal: Feet flat on the floor, thighs roughly parallel to the ground, knees near a 90-degree bend. Cornell’s ergonomics program recommends adjusting until the front of the knee sits at or slightly below hip height.
Where people go wrong: The most common miss is raising the seat to match a desk that’s too tall. Feet end up dangling, pressure builds behind the thighs, and circulation to the lower legs slows down. Going too low creates the opposite problem: knees rise above the hips, and the lower back’s curve flattens out.
How to fix it:
- Stand beside the chair, then raise or lower it until the cushion lines up with the bottom of your kneecap. Sit down and confirm that your feet rest flat, with no pressure behind your thighs.
- If the desk is fixed and too high once your feet are flat, raise the chair further and add a footrest.
2. Seat depth
Seat depth controls how far the cushion extends forward, and it’s one of the most overlooked features on higher-end chairs.
The goal: Your back resting fully against the backrest, with a two- to three-finger gap between the front of the seat and the backs of your knees.
Where people go wrong: Push the seat pan in too far and the edge presses behind the knee, cutting circulation and leaving legs feeling heavy by afternoon. Leave it too far out, and the thighs go unsupported, leaving you perched on the front edge, disconnected from the lumbar support.
How to fix it:
- Sit all the way back so your spine meets the backrest, then find the seat depth slider, usually a lever under the front of the cushion.
- Slide the pan until two to three fingers fit behind your knee.
3. Lumbar support height and depth
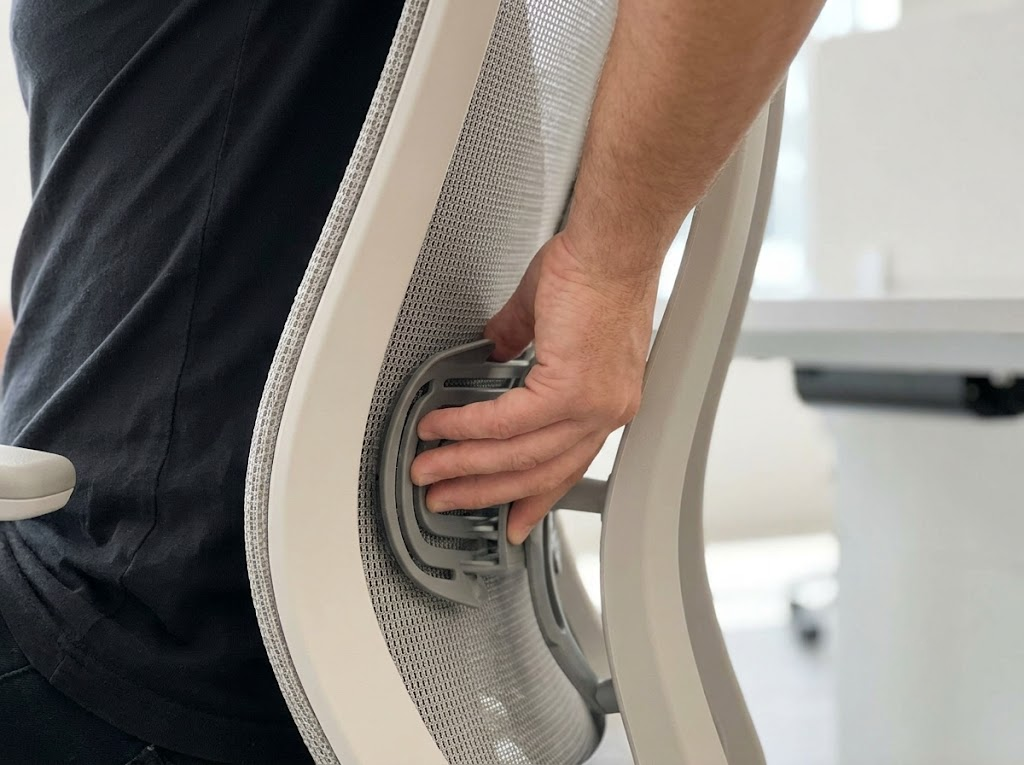
The lower spine has a natural inward curve, and the chair needs to fill it rather than leave it unsupported.
The goal: Firm, even pressure across the small of your back, roughly where your belt line sits, with no gap between your spine and the pad.
Where people go wrong: Most lumbar pads stay where they were shipped from the factory, which rarely lines up with a real spine. Set too high, the pad pushes the mid-back forward and rounds the shoulders. Set too low, it never reaches the spine at all, leaving the lower back to round forward unsupported all day.
How to fix it:
- Sit fully back and use your hands to locate the inward curve of your lower back.
- Slide the lumbar pad up or down until the thickest part meets that curve.
- If your chair has a depth dial, turn it until you feel firm, even support.
4. Backrest tilt and recline tension
A chair that only locks upright works against you, since sitting rigidly still for hours strains the back more than a slight, supported recline.
The goal: A recline of roughly 100 to 110 degrees, held by a tension dial matched to your body weight, so the backrest supports you without bracing your core.
Where people go wrong: A backrest locked at a strict 90 degrees keeps the back muscles working all day just to hold you upright. The tension dial causes its own trouble too. Too loose, and the chair drops the moment you relax. Too tight, and the backrest barely moves.
How to fix it:
- Release the tilt lock so the backrest moves freely.
- Find the tension knob, usually a dial underneath the center of the seat.
- Turn it until leaning back takes gentle, even effort rather than a shove or a sudden drop.
>>> Read more: How to Set Up the Best Ergonomic Desk Position
5. Backrest height adjustment
On chairs with a backrest that slides independently of the lumbar pad, this setting decides which part of your spine gets the most support.
The goal: The widest curve of the upper backrest resting level with your shoulder blades, rather than your neck or mid-back.
Where people go wrong: Raise it too far and the shoulder support pushes straight into the neck. Leave it too low, and the upper back gets no support at all, so it starts to slouch by mid-afternoon.
How to fix it:
- Sit fully back in the chair.
- Grip the backrest frame and shift it up or down in small increments.
- Stop once the chair’s curve matches your back and your shoulder blades feel supported.
6. Armrest height

Armrests take the weight of your arms off your shoulders and neck, and getting this one wrong is a common source of end-of-day tension.
The goal: Shoulders relaxed and level, elbows bent between 90 and 120 degrees, forearms resting on the pads without effort. OSHA’s guidance on neutral body positioning describes this same relaxed elbow angle as part of a neutral working posture.
Where people go wrong: Armrests set too high force a shrug that turns into neck tension by the end of the day. Set too low, they’re little more than decoration, so you end up leaning to one side just to find somewhere to rest your elbow.
How to fix it:
- Lower both armrests to their minimum height.
- Let your arms hang loose, then bend your elbows to roughly 90 degrees.
- Raise each armrest until it just touches the underside of your forearm, keeping your shoulders down.
7. Armrest width and pivot
On chairs with adjustable width and pivot, this setting fine-tunes how close your arms sit to your body.
The goal: Elbows staying close to your torso without reaching outward or pinching inward, whatever feels most natural while typing.
Where people go wrong: Lock them too wide and the elbows drift away from the body, straining the shoulders. Lock them too narrow, and the elbows pinch against the ribs, or the wrists twist if the pads point the wrong way.
How to fix it:
- Slide the armrests inward until they sit directly under your resting elbows.
- If you type on a narrow keyboard, pivot the pads slightly inward to match your forearm angle.
- Swing an armrest out of the way if it collides with the edge of the desk and keeps you from pulling in close.
8. Headrest and neck support
Not every chair has a headrest, but for those that do, this is the setting most likely to end up in the wrong position.
The goal: Light contact with the base of your skull and upper neck, supporting the weight of your head during recline rather than pushing it forward during active work.
Where people go wrong: Push it too far forward and the chin tips down into the same posture the headrest is supposed to fix. Leave it in place while typing upright, and it just gets in the way.
How to fix it:
- Adjust the height and angle so the pad lines up with the base of your skull and only makes contact when you lean back.
- Let your head move freely while typing, and save the headrest for breaks and recline.
>>> Read more: Tech Neck: How to Avoid and Fix It
Signs Your Chair Still Isn’t Adjusted Right
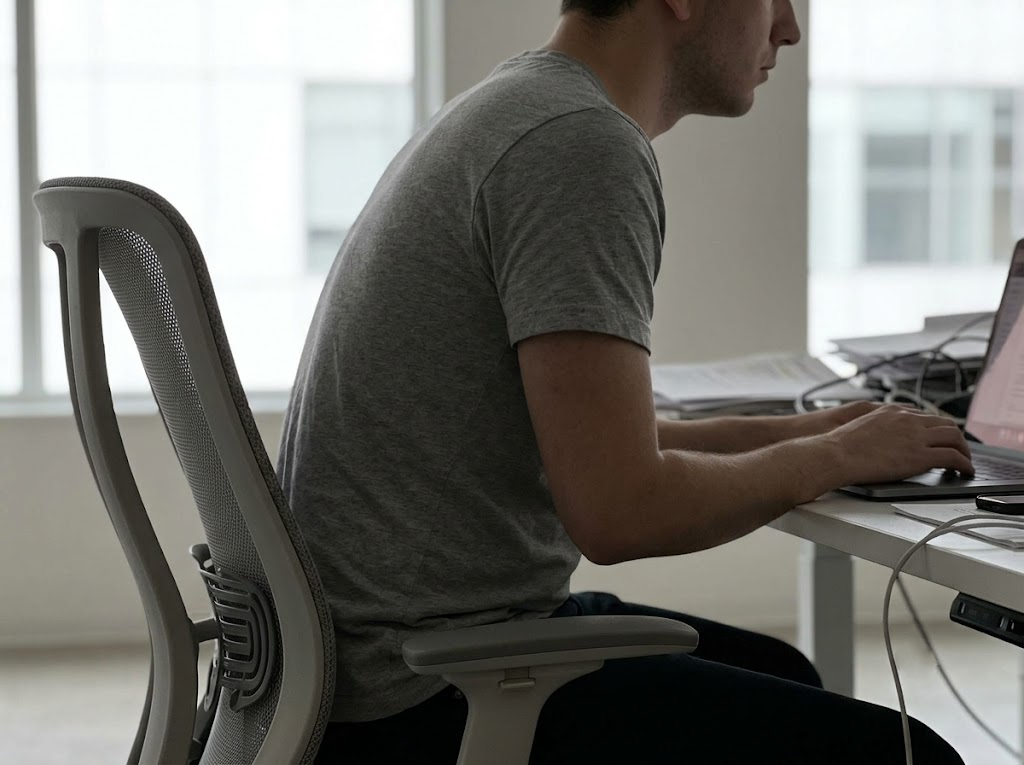
A few reliable clues point to a chair that still needs work, even after you’ve gone through every dial:
- Numbness or tingling behind your knees by mid-afternoon
- Shoulders creeping toward your ears without you noticing
- Lower back ache that eases the moment you stand up
- Sliding forward until you’re perched at the front edge of the seat
- Tucking one leg underneath you or sitting cross-legged out of habit
- Resting your wrists on the desk edge to compensate for armrest height
A few of these showing up consistently usually point back to one of the eight settings above.
>>> Read more: 5 Signs You’re a Victim of Bad Desk Ergonomics
How Often to Recheck These Settings
Chair settings aren’t a one-time task. A few situations call for a quick recheck:
- New shoes with a different heel height, which shifts your effective leg length
- A different desk, monitor, or keyboard tray
- A noticeable weight change over a season
- Returning to the desk after time away, when posture habits tend to drift
A 30-second check once a month catches most of this early. If you’ve gone through every setting above and something still feels off, a professional workstation assessment can usually spot what a self-check misses.
8 Ways to Set up your Office Chair | Ergo Global
Let Ergo Global Optimize Your Workspace
Eight settings are a lot to track through trial and error, and most people settle for a rough approximation rather than a true fit. At Ergo Global, this is the work we do every day. Our consultants assess individual workstations and full offices, then walk people through adjustments most have never adjusted before, from the tension dial under the seat to the lumbar depth, which most chairs hide behind a small lever.
If your team is still guessing at seat height and lumbar position, we can help you stop guessing.
Contact Ergo Global for a workstation assessment, and we’ll get every chair in your office working the way it was actually designed to.